
 Several years ago I wrote a post called, ‘Creating Peace at Home Through Organizing’. Click on the link to read the full article. The article explains why decluttering and organizing the spaces in your home is so important to achieve peace in your life.
In that post I used the acronym PEACE to describe the five steps in the organizing process. The acronym was created to depict the result of organized spaces – peace. This post is the fourth in the series to provide more details for each step in the organizing process. You can read the first three steps by clicking on the links below.
You’ve already determined that you want to get organized. My recommendation is to avoid the overwhelm of the size of the project by starting small. Choose a drawer, a cabinet, or maybe a smaller closet to ease into the overall project.
Step 1 – Put like items together
Step 4 – Containment
After you put like items together, eliminate excess, and assign homes for your keepers, you need to containerize.
According to the Merriam Webster dictionary, the definition of containment is, ‘the act, process, or means of keeping something within limits’. When you contain your things, you are setting limits, or boundaries for the amount of your belongings. When a category of items fills up a container, you know you’ve reached the limit for the amount of space for that category. Those like items are all together so you know where to find them, you know where they live to put them back after use, and you won’t buy multiples.
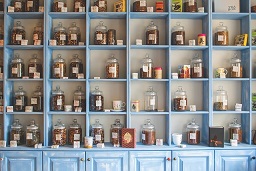
Storage containers come in many different forms, from open baskets and shelving of all sizes, to pantries, filing cabinets, closets, drawers, and plastic containers with lids. Even your house is considered to be a big storage container!
Choosing the appropriate type of storage for your things is an important factor when it comes to maintaining your systems. The containers you choose need to make sense to you in terms of the contents, be easily accessible, and fit in the space that you have available. Aesthetics should also be a consideration depending on the location of the container, and also to keep the fun in maintaining your systems. Wouldn’t you rather put items back into a decorative basket with a fun label? I know I would!
Some people need to have their things out where they can see them. They relate to that old saying, ‘out of sight, out of mind’. Others like them behind cabinet doors or stored in opaque containers with lids, to maintain the appearance of clutter free spaces. Decide if you like things behind closed doors, or out in the open, and then containerize based on your needs or preference.
Look around your spaces to see what types of containers you currently use. What catches your eye? Storage containers that stand out with colors, fit in with your décor, have textures, or are just plain fun, are sure to draw your attention immediately. Determine what containers are working well for you and continue containerizing using that strategy. For the systems that aren’t working well, think about what the issues are so you can learn how to make adjustments.
During steps 1 and 2 of the organizing process, you probably emptied a lot of containers. Those empty containers can now be repurposed to use for your ‘keepers’. Work with the storage containers you have available before you buy additional storage. In most cases, you don’t need to spend money for additional containers. If you buy containers before you determine the contents, you may need to return them, or they can turn into clutter for lack of use.
I’ve compiled a list of do’s and don’ts that will make your storage containers and methods more effective.
Do…
- When storing items in cabinets and drawers, place the frequently used items in the front, and infrequently used items towards the back.
- Store backed up data from your local hard drive to an external hard drive, or online storage service, or both.
- Store pairs of women’s shoes heal to toe; this method uses less space and you can see both at a glance.
- Go vertical for storage with media towers, book cases with 5 or more shelves, or install shelves on walls, if you have small spaces.
- Use sticky notes as temporary labels for storage space planning.
- Scan pictures in old photo albums to your computer and load them into digital photo frames to free up storage space.
- Use labels for all containers whether you can, or can’t see inside the container.
Don’t…
- Store items on counter tops that you don’t use every day. This can cause unnecessary clutter.
- Buy storage until you have assessed your needs for a particular organizing project.
- Use your email inbox as a catch-all for messages. This causes excessive clutter and it will be difficult to find what you’re looking for. Instead, only store messages that you need to take action on, or that you haven’t read yet.
- Hold on to clothes that don’t fit, thinking you will lose enough weight to get back into them.
- Leave gift cards at home; instead, keep them in your purse or wallet so they are available when you need them.
- Use storage containers that you can’t see inside without labeling them.